Monday 28 May 2012

Why my Toshiba laptop suddenly shuts down by itself without warning?

“My Toshiba laptop suddenly shuts down by itself without any warning. Sometimes it works fine for hours, sometimes it shuts down in 10-15 minutes.” This complaint we hear from our customers over and over again. About 15-20% of all Toshiba laptops we get for repair, suffer from an overheating problem. Yep, OVERHEATING!
This is one of the most common problems with Toshiba laptops we deal with.
Indications of laptop overheating problem:
  1. The keyboard and the bottom of your laptop are very hot when the laptop is working.
  2. The CPU fans are working all the time at maximum rotation speed and operate much louder than before.
  3. The laptop suddenly shuts down by itself without warning. When it just started, the laptop was shutting down after 1-2 hours and how it shuts down after 5-10 minutes of operation.
  4. The laptop works fine when it runs idle, but shuts down as soon as you start using any memory demanding applications (DVD player, image editing software, video editing software, etc.).
Solution:
If the CPU heatsink is not clogged with dust and lint completely, you can use canned air and just blow it inside the laptop through the openings on the bottom and on the sides. It’s nice as a precaution measure, but it might not work if your laptop already has a problem and the heatsink is completely clogged.
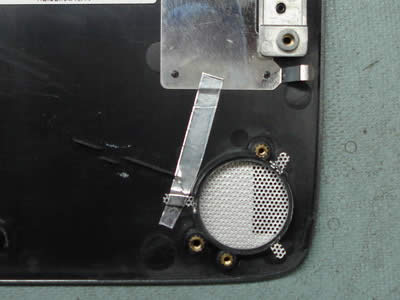
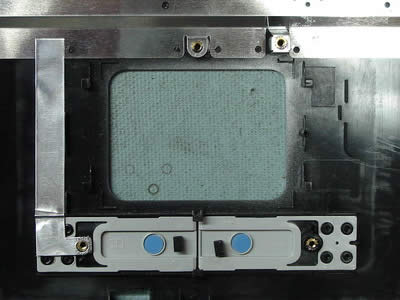
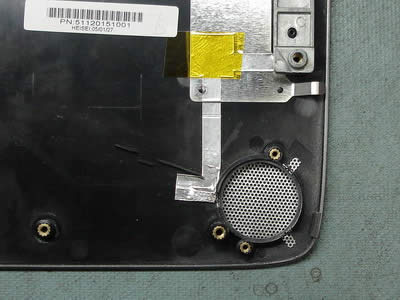
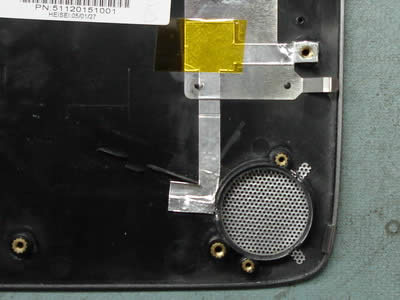
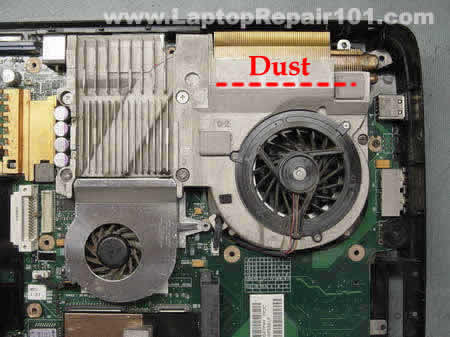
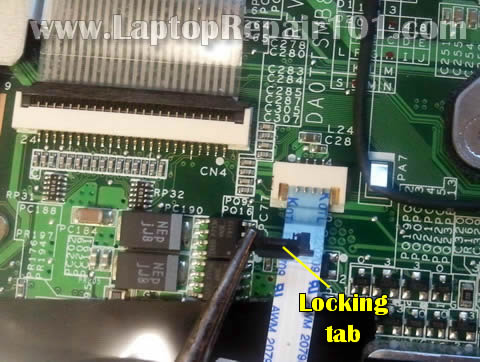
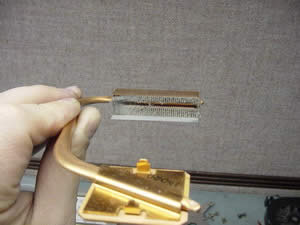
  1. Open the laptop case, so you can access the CPU fan and the heatsink. In some cases you can access the heatsink through the latch on the bottom of the laptop. Sometimes (for example Toshiba Satellite A70/A75) you have to open the laptop case all the way down.
  2. Carefully disconnect the fan cables on the system board and remove the fan. If the fan makes unusual sound when it spins (grinding sound), I would recommend to replace the fan.
  3. Clean the fan and the heatsink with compressed air.
  4. I would also recommend removing old thermal grease from the CPU and applying new grease for better heat conductivity.
UPDATE: I just received a nice tip from MC N’Colorado. I think it could be useful for all of you with guys:
I decided to use a shop vac to suck the dust out and it worked. I tested it by letting the machine run all night and it worked. It’s been a couple of weeks now and I’m glad I did it. I was ready to take the machine apart, now I’m glad I didn’t. I’d suggest you use a heavy duty shop vac to clean out the fan and heat sinks first.
I agree. Try to fix the problem without taking the laptop apart first but I would recommend using a powerful air compressor instead of a vacuum cleaner.
If your laptop is still under warranty, you can take it to any Toshiba Authorize Service Provider and fix the problem at no charge to you.

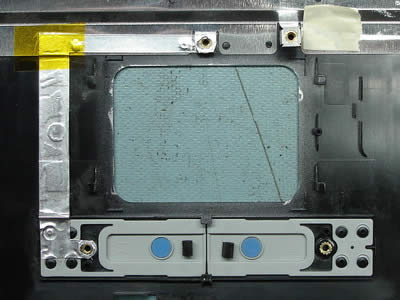
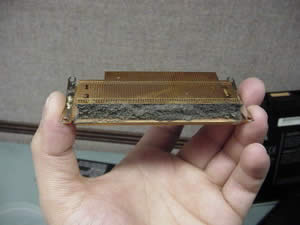
Toshiba Satellite A15 Clogged Heatsink


Toshiba Satellite A35 Clogged Heatsink

]
Toshiba Satellite P15 Clogged Heatsink. Absolute champion!Toshiba Satellite P15 Clogged Heatsink. Absolute champion!

Toshiba Satellite 1900. Laptop loses power and shuts down without warning.

A bad connection between DC-IN power jack on the system board and the system board is a very common problem with Toshiba Satellite M35X and Toshiba Satellite A70/A75 notebooks. If your laptop is out of warranty, then you can fix the problem by resoldering DC-IN jack on the system board. If it’s still under warranty, it would be fixed at no charge to you.
Problem symptoms:
  1. Laptop randomly shuts down without any warning.
  2. Power LED and battery charge LED start flickering when you wiggle the power cord or the AC adapter tip on the back or your laptop.
  3. The battery will not get charged.
  4. When you plug AC adapter, the laptop appears to be dead and there is no LED activity at all (DC-IN jack on the system board is broken).
To fix the problem, you have to take your laptop apart, remove the system board to resoleder or replace the DC-IN jack. Toshiba Satellite M35X andToshiba Satellite A70/A75 disassembly guides will help you to remove the system board. Take a closer look at the power jack on the system board with a magnifying glass. In most cases you get the power problem because of a bad connection between the DC jack and the system board, you’ll see a crack between the DC jack connector and the system board.
Here is an example of Toshiba Satellite M35X power jack. The crack occurs between the DC jack pin and the system board.


Resolder Satellite M35X DC jack on the system board
In some cases the connection is good, but the DC jack is bad itself. You can find a new DC jack for Toshiba Satellite M35X and Toshiba Satellite A70/A75 laptops here. Search for DC jack M35X or DC jack A75.
UPDATE:
Sometimes, after you replace the jack, you can see that the system board doesn’t get power at all. The battery will not charge and the power LED will not light when you plug in the AC adapter. So, here’s a possible explanation.
When a connection between the positive pin and the motherboard breaks (cracks), the power jack gets loose. You can feel it when you plug in the adapter plug. A loose power jack can damage the trace inside the hole in the system board. Take a look at the picture.

As you see, the positive pin goes through the hole in the system board and you solder it on the top side. Right? What if the trace between the top side and the bottom side is broken somewhere inside the hole? I’ve seen it before a few times. In this case everything looks nice and clean on the top side. When you plug in the AC adapter, you get normal voltage readings between “+” and “-“ pins on the top side, but the power DOESN’T go to the motherboard at all, because there is no connection between the top and bottom sides. Test with a multimeter if there is a connection between the top and the bottom.
If the trace inside the hole is broken you still can fix it. You can run a wire to connect the top and the bottom sides. Be careful not to short something on the board.
Update:
Here’s another solution to fix the power jack problem, it shows how to relocate the power jack outside the laptop base. Check it out here: Toshiba Satellite A75 failed power jack workaround.
When you repair a loose power jack, it’s a good idea to check the jack on both sides of the motherboard. When you remove the top cover from a Toshiba Satellite A70/A75 laptop you can see only points where the jack is soldered to the motherboard as it shown on the second picture in this post, but you cannot see the jack itself as it shown on the first picture.
Removing the motherboard from Satellite A70/A75 laptop is a good idea because the jack itself might has a broken “+” pin, as it shown on the picture below. If the “+” broke off the base, you’ll have to replace the jack

Toshiba Satellite M35X, A70 or A75 locks up, freezes up or reboots when you touch the laptop speakers

If you own a Toshiba Satellite M35X, A70 or A75 laptop then you can experience the following problem. You laptop might lock up, freeze up or even reboot by itself when you touch the palm rest around the speakers area. It happens because of a static electricity discharge when your touch the laptop speakers. In some cases you will not even fill that discharge. The problem occurs because of improperly grounded top cover assembly. To fix the problem, it is necessary to install a new modified top cover assembly. If you laptop was made before January 2005 then most likely you have unmodified top cover. For example, I made some pictures from a Toshiba Satellite A75 top cover assembly. The top cover for Toshiba Satellite M35X is almost identical.
On these pictures you see unmodified top cover assembly for Toshiba Satellite A75. The foil runs from the speaker and from the touchpad to the metal chassis.


On these pictures you see a modified top cover assembly. The foil runs from the speaker and the touchpad, touches the metal chassis and ends on a screw stud.


On this picture I remove the metal bracket, so you can see where the foil tape is connected.


I think it is possible to make this modification yourself. All you need is to find a foil and run it as it shown on the pictures. I have never done it myself, so not sure about the result. :)
Here are some other problems found in these models.

Toshiba Satellite A105 battery charging problem

Today I got Toshiba Satellite A105-S2712 for repair with the battery charging problem. It is a new model and we do not have a lot of experience with these laptops. The customer complained that the laptop will not charge the battery when it is plugged into the AC outlet.
The laptop failure symptoms:
The laptop will not turn on when I try to start it from the battery. When the laptop is turned off and plugged into the AC outlet the battery charge LED doesn’t light up. I know that the battery is not charged and the LED should light up when I plug the laptop into the AC outlet. The laptop starts fine when it is plugged. When I move the mouse over the Toshiba Power Icon in the lower right corner, the balloon will pop up and there is a line in there: Battery Remaining: N/A.
The problem repair procedure:
You can easily fix the problem just by updating the BIOS. Toshiba says that the BIOS version should be at least v1.30. So, go to Toshiba website and click on Downloads. Select your laptop model and find any downloads for the BIOS. In the BIOS change history you will see the description of changes.
After I updated the BIOS, the battery charging problem disappeared.

Toshiba Satellite A60 and A65 problems

Let’s talk about problems typical for Toshiba Satellite A60 and A65 notebooks. Do you own one of these laptops? Is it working fine for you?
Here are some typical issues I’ve notices with this model.
1. First of all – overheating
Does your laptop shuts down without any reason when you ran CPU intensive programs? If yes, then most likely it happens because the laptop overheats. It happens because overtime the heatsink gets clogged with dust. A layer of dust collects between the cooling fan and the heat sink (dashed line on the picture) and heat produces by the processor gets trapped inside the laptop. As a result of that, the processor overheats and the laptop shuts down.


There are two different way to clean the heat sink and fan in these models:
- Buy a can of compressed air or find an air compressor and blow off the heat sink through the air intakes on the bottom of the laptop.
Remove the keyboard (steps 5-9) and you’ll get an access to the cooling fan. Blow off dust from the fan and the heat sink.
In some cases the laptop overheats because of defective cooling fan. The fan should start working as soon as you power up the laptop. If the fan will not star, most likely it’s bad and must be replaced. You can find a new heat sink cooling fan for Satellite A60 and A65 notebooks by the following part number: V000042110.
2. Defective onboard memory
Here’s another common problem – bad onboard memory. This memory is integrated into the motherboard and if it goes bad you’ll have to replace the entire motherboard.
If your laptop starts with some weird characters or lines of dots on the screen, most likely you have a faulty onboard memory. If you test the laptop with an external monitor, you’ll see the same defective video on the external monitor too. You can test the onboard memory with Memtest86+ utility. Remove any external RAM modules and run the memory test. If the onboard memory fails, you’ll have to replace the motherboard.
The integrated memory module is located close by the memory extension slot, under the foil.


UPDATE: If you have bad memory, you should read comment 93 submitted by Daniel on September 28th, 2007.
3. Last but not least – power jack issue.
With Satellite A60 and A65 notebooks this problem is not as common as with Satellite M30X, M35X, A70 and A75, but it’s still a problem. Overtime, the power jack might get loose and the positive pin stops making a good contact with the motherboard anymore. As a result, the laptop switches to the battery power even though the power adapter is still plugged in. Usually you can temporally fix the problem by adjusting the power adapter plug on the back of the laptop, but after some time the problem reappears.
In this case you’ll have to disassemble the laptop, remove the motherboard and resolder the power jack. I’m buying new power jacks here.
Do you experience the same problems or you have another issue with your Satellite A60 or A65 notebook? Please share your experience.

Laptop detects the battery but shuts off when AC adapter unplugged

When you move the cursor arrow over the battery icon while the laptop is connected to AC adapter, it show the remaining battery charge and says “charging”.

The batter power meter utility (if available) also shows that battery is connected and charging.

But… as soon as you unplug the AC adapter, the laptop shuts off completely.
Possible problems: 
1. The battery not seated correctly. Try reconnecting the battery.
2. The battery contacts got dirty or oxidized and the battery is not making good connection with the motherboard. Try reconnecting the battery a few times.
3. If reconnecting the battery doesn’t help, most likely the battery is bad and has to be replaced.
4. If you replaced the battery but the problem still exists, this is motherboard related failure. Apparently the battery charging circuit has failed. In this case the whole motherboard has to be replaced (or repaired on component level).

Laptop turns on and off repeatedly.


Problem description:The laptop turn on without showing any image on the screen. After a few seconds the laptop turns off by itself. Then it turns on and off again. It continue turning on and off repeatedly until you power off the laptop completely.
Possible problem:
Most likely it happens because of some kind of motherboard failure. You can try reseating/replacing memory as I described in the Problem 2. If it doesn’t help, I would say this is motherboard related failure.
In most cases it’s not worth replacing the motherboard, better to buy a new laptop.
source 
www.laptoprepair101.com

Laptop turns on but screen is blank.


Problem description: The laptop turns on, LED lights on the laptop turn on, cooling fan works but nothing appears on the screen. The screen is completely black and blank. There is no image on the screen at all, not even a very dim image.
Possible problem:
- This problem could be related to the memory failure. It’s possible one of the memory modules failed and the laptop doesn’t turn on because of that. In this case you can try reseating memory modules to make sure they are making good contact with the slot. You can try removing memory modules one by one and test the laptop with only one memory module installed. You can try replacing memory modules with new modules.
- If reseating/replacing memory modules doesn’t help, try removing the hard drive, DVD drive, modem, wireless card, keyboard, etc… In other words, disassemble the laptop to bare minimum and test again. If the laptop still doesn’t turn on, most likely you have failed motherboard or processor.

source 
www.laptoprepair101.com

Problem 1. Laptop doesn’t turn on at all.

Problem description: When you plug the AC adapter into the laptop, there are no lights turning on at all. When you push on the power button, nothing happens. The laptop appears to be completely dead, makes no sounds, no indications of life.


Possible problem:
- AC adapter failed and the battery discharged completely. First of all, test the AC adapter. If it’s dead, replace the adapter.
- DC jack separated from the motherboard (or DC jack broken) and the laptop doesn’t get any power from the AC adapter. In this case the DC jack has to be replaced.
- Laptop motherboard failed. If that’s the case, most likely the laptop not worth fixing.
Here are some tips for testing laptop AC adapter and DC jack connector.
Also, make sure to read step-by-step instructions for troubleshooting dead laptops.

another type of touchpad connector

The locking tab is broken and also separated from the connector base.

Position the broken tab the way it was plugged in before but do not push it into the connector yet.


Now insert the touchpad cable. In most cases it goes under the locking tab.
Push the cable all the way into the connector.

While holding the cable, push the locking tab into the connector.
Even though the locking tab is broken, it should secure the tochpad cable.
Again, apply some sticky electrical tape over the connection to secure it.


source 
www.laptoprepair101.com

how I fixed the broken connector

Insert the touchpad cable back into the connector. The touchpad cable has contacts on the bottom side – the side which is facing the motherboard.
In order to work properly the cable contacts have to touch contacts inside the connector but it’s not happening when the locking tab is missing.


Find a small piece of plastic. It has to fit inside the connector and be thick enough to fit tightly between the four metal hinges and touchpad cable.
Insert this piece of plastic into the connector. At the same time make sure the touchpad cable also inserted into the connector.


On the following picture you see the touchpad cable seated tightly inside the connector.
The piece of plastic applies pressure on the touchpad cable and it makes good connection with contacts inside the connector. The touchpad works again!
Now you can secure the connection with sticky electrical tape.
This simple trick fixed my touchpad.


How to repair broken touchpad connector on laptop motherboard

source : www.laptoprepair101.com
In this post I explain how to repair broken touchpad cable connector on laptop motherboard.
Let’s say you were fixing a laptop yourself and accidentally damaged the touchpad connector or any other similar connector. The problem is the touchpad connector soldered to the motherboard and it’s impossible to replace it with regular soldering tools. Also, these connectors are not sold separately which makes the replacement even more impossible.
Well, the connector is broken and cannot be replaced. Let’s try to repair it. We’ll do it using the same technique as for fixing the broken keyboard connector.
On the following picture you see a typical laptop touchpad connector. The connector has а white base (permanently attached to the motherboard) and locking tab (moving part).
In order to unlock the connector you lift up the left side of the locking tab. The locking tap opens up at a 90 degree angle and releases the touchpad cable. After that you pull the cable from the connector.

On the following picture you see a broken touchpad connector. I wasn’t careful enough and separated the locking tab from the connector base.
Unfortunately there is no way to attached broken tab back to the base.


How to start Backup and Recovery Manager on Dell laptops.

How to start Backup and Recovery Manager on Dell laptops.

Here’s another example. Now it’s for Dell laptops.
Again, follow steps 1-5 and on the System Recovery Options select the very last option: Dell Backup and Recovery Managers.


This will take you to the next window where you can start the operating system re-installation process. Follow the instructions.

How to start Recovery Wizard on Toshiba laptops.

In order to start Toshiba Recovery Wizard you follow STEPS 1-5.
This will bring you to the same System Recovery Options with Toshiba Recovery Wizard at the end.
Click on the Toshiba Recovery Wizard button.


On the next scree you’ll see Toshiba warning about data deletion. Click the next button.


In the next Toshiba Recovery Wizard window you can select Recover to out-of-box state option.
Click on the next button and follow instructions.

How to reinstall factory operating system on different laptops

In this post I explain how to reinstall factory operating system on different laptops. This should work for most laptops running Windows Vista or Windows 7 operating systems.
This could be useful if your operating system stopped working properly, got corrupted or infected with a virus.
WARNING! Running system restore utility will erase all personal data on the hard drive and re-image it back to factory defaults. Make sure all personal data is backed up before reinstalling the operating system. Also, make sure the laptop is running on AC adapter power during the recovery process.
These days most laptops are sold without recovery discs. Instead they have a hidden (or visible) recovery partition with the factory image. In order to re-image the hard drive back to factory defaults it’s necessary to initiate the recovery wizard and it’s very similar for many different laptop brands.
As an example I’ll show step-by-step operating system re-installation process on HP laptops.
Again, it will be the same or very similar for other laptop brands.


STEP 2.
On the next screen you should see Advanced Boot Options.
If for some reason you don’t get this screen, restart the laptop and press on the F8 key again.
From all available options select the very first line: Repair Your Computer and press on the Enter key.


STEP 3.
This should take you to the System Recovery Options.
Select available language and keyboard layout. Press on the next button.


STEP 4.
On the next screen select your user name (must be user with administrative rights) from the drop down menu.
Enter the user password and press the OK button.


STEP 5.
This will take you to the next System Recovery Options window.
The last option will be HP Recovery Manager. Click on it.


STEP 6.
This will take you to the next window: HP Recovery Manager.
There are many different options here and one of them – System Recovery (Restore your computer to its original factory conditions).
Select this option and follow the instructions on the screen.


source 
www.laptoprepair101.com

ARCO Factory Documment's

hiiii all 
now we have arco Factory Document's
it's 7 file 
start from the begining 
explain all thing about ARCO and how can u do arco for hdd 
how can u make an optimisation for SA
and how can u optmise your user AREA 
later we will put picture to all file and our book about ARCO 
wait 4 us 
bye 

Tuesday 22 May 2012

BACKUP ROM AND MODULE BY TREX

HIII ALL 
THIS IS MY LITTEL VIDEO I GIVE IT TO STUDENT IN ONLINE COURSE 

IT EXPLAIN HOW CAN U BACKUP ROM 
AND MODULE 
BY FACTORY TREX3.38 SOFTWARE 

I UPLOAD IT TO OUR CHANNEL IN YOUTUBE
SEE IT  HERE 


SEE U IN OTHER VIDEO 

www.hpwlab.com

Monday 21 May 2012

TREX 4 WD V3.38 + original factory manuall


With Trex Only U are Professional Hdd Repair 
now We provide trex with factory manual 
and our spechial manual 
we explain all trex script commands 
we give online course for 5 days to explain TREX practically 
we support TREX in our main Website 
www.hpwlab.com

be carfull !!!!!!!!!!
some people sell fake trex with old version as it's new 

withe NEW TREX u can DO

1. ARCO  44 , 46 , 6A , 6B ,.........., 6D
2. Monitor self scan
3. generate rom 
3. read and write rom 
4. read and write tracke
5. read and write module
6. format SA
 7. this is some another advantages
Test firmware 
Shows the hard disk firmware directory 
Check SMART Table 
Clear SMART Table 
Single backup module 
Write a good backup a single module 
Combined GP 
Immediately merge pg 
Clear G 
Clear P 
Close head 
Low format 
Edit ID 
Write 01 sectors 
Format firmware area 
Firmware area cleared 
Clear E0-E6 F0-F1 in the LOG 
Automatic test all current head good or bad, good returns OK, bad return BAD. 
Automatically get PE bin reading E8 E9 E10 
Calibration pointer 
Automatic self-calibration opened from 0x01 (range S53. S58) dealt with, the calibration is open. 
View real-time process. 
Automatically from 0x0e to open self-calibration (if sf fails, then use this to run (in the range S53. S58)) dealt with, the calibration is open. 
Forced to stop calibration (set in the IDE 1, not IDE0) 
Automatic backup the whole firmware track (range S53. S58) 
Automatically write the whole firmware track (range S53. S58) 
Automatic full for SABRE58 Series Firmware (range S53. S58) 
Automatic full for SABRE53 Series Firmware (range S53. S58) 
Automatic full write S58 series firmware (range S53. S58) 
Automatic full write S53 series firmware (range S53. S58) 
Automatic full backup S58 series firmware (range S53. S58) 
Automatic full backup S53 series firmware (range S53. S58) 
Write dir 
Write 35 modules 
Automatic with 47 adapter module (range S53. S58) 
Automatic with 40 adapter module (range S53. S58) 
Save 128K ROM 
Write a 128K ROM 
Repair patches and the bad sectors of command 
Clear 
Decryption 
Encryption 
Disable Password 
Homing 


Data read 
L PCB measured head 
exchange "L" PCB ROM 
Since the adapter plate 47 L 
Selected head adapter plate cut L 
L track heads to save the selected board 
Write head track selected 
Deposit all firmware RPM 
Write the whole firmware RPM 
Save the whole firmware HAWK 
Write the whole firmware HAWK 
Save HAWK track 
Write HAWK track 
Initialize three 
40 copies from the adapter into the 47 MR 
41 copies from the adapter into the 47 MR 
raider series from the copy of MR 40 adapter into the 47 
raider series fit into the MR from 41 copies of 47 
Save the whole firmware SEQ 
SEQ write the whole firmware 
Save the whole firmware BUC 
BUC to write the whole firmware 
RAIDER to save all firmware 
RAIDER write the whole firmware 
Adjustment module 40 
Format covering 
Save the whole firmware ORION 
ORION write the whole firmware 
ORION with 47 

ROYL Series 

32-bit pointer calibration 
Automatic calibration to open ROYL series (from 01 began to run, ie a DC) dealt with, the calibration is open. Calibration 
View real-time process. 
Calibration of force to stop ROY 
ROY test head 
ROY with ROM 
ROY with ROM 
ATA backup module 11 
Automatically load 11 
Set pointer to start the calibration 
Information for Adaptation 
Get fit information (new) 
Map display head 

AAJS copy MR disc from 47 to 40 
AAJS copy MR disc from 40 to 47 
(Micro-code, call me.) Adapter 40 
(Micro-code, call me.) Adapter 47 
Adaptive ZEUS Series 47 
47 R line adaptive 
Beheaded and set 47 
Cutting heads fit the selected ZEUS 
To cut off the head of the mapping 
Set the desired number of heads of TPI and CAP 
ROY read and save backup ROM SA 
m with ROM 
Save the whole firmware RPM, and save ROM.BIN, 11 PERMOVL. BIN, 35 RPLIST.BIN 
Save the whole firmware 
Deposit 334,041 
Save 192K ROM 
Save 256K ROM 
Save A 47 
Save selected track head 
Save a single module 
Write 334 041 
Write A 47 
Write a 192K ROM 
Write a 256K ROM 
Full write firmware RPM 
Since the time to write the whole firmware from RPM 
Full write firmware RPM 
Written to the selected track heads 
Write a single module 
Set custom CAP HQ 
CAP set custom TAG 
Display CAP 
Show TPI 
Shows the process 
Editing disk model 
Test head 
Test the selected head 
Set custom LBA 
Set custom DCM 
TPI head set for all 
Head set for all CAP 
TPI for the 0 setting 
TPI is a set 

TPI for the two settings 
TPI for the three settings 
TPI for the 4 set 
TPI for the five settings 
Set for the 6 TPI 
TPI for the 7 set 
Set the CAP to 0 
CAP is a set 
Set for the two CAP 
Set for the three CAP 
CAP for the four set 
CAP set for the five 
Set for the six CAP 
CAP set for the 7 
Read and re-fit 47 103 
Reconstruction DIR 
Check the calibration LOG 
Compare 47 and 103 
Clear the selected module 
Clear the selected ID module 
Clear SPTLOG 
Clear all defects table 
Cut the selected head adapter 
Beheaded 
Table shows P 
Shown in Table G 
Change the 28 to go C4 
Format firmware area 
Empty defects 
Show ZONE 
Dan cut the selected LBA 
Show ZONE 
Dan cut the selected 
Exchange ROM 
Exchange 0B module 
Exchange 40

for more info

002-01283689946
002-01285870730

or E-MAIL

semsem_02_08@yahoo.com


www.hpwlab.com